
User manual
March 2016 (v. 1.1)

EPR20160303_EN_3
© 2016 PIXEL-TECH. All rights reserved.
TABLE OF CONTENTS
1..... Installing the Event Print Server Software
2..... Configuration of an event in the Event Print Server Software
2.1.2 Event configuration in the Photographer only mode
2.3 Mode: Mixed (with free photos & paid over limit)
2.5 Users of the mobile application
3.1 Internet via Event Print Router
4..... Working with the event – the main window of the Event Print Server Software
1. Installing the Event Print Server Software
The Event Print Server Software installation is very simple. The wizard is formulated to quickly and easily guide you through the next steps. To properly install the Software, use the detailed manual included in the Event Print Server Software package (entitled as follows: "Installation guide”).
Once the Event Print Server Software has been installed correctly, you should:
· have connection to the Event Print Router (LAN cable connected to the router's LAN port and an available
Wi-Fi network named EventPrint),
· be able to receive photos with the application installed on the mobile device (smartphone, tablet, etc.),
· have selected printer and paper size, on which the photos will be printed.
2. Configuration of an event in the Event Print Server Software
To configure a hosted event, press the [Settings] button in the main window of the Event Print Server Software.

In the Event tab, press the [New event] button.
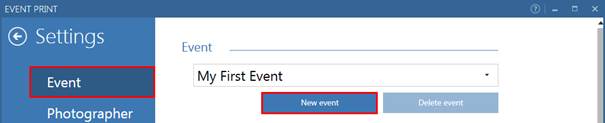
In the window that appears, enter a name for an event in accordance with the guidelines described, and then press the [OK] button.

Next, make a detailed configuration of the event, starting with the selection of the operating mode from the four possible ones:
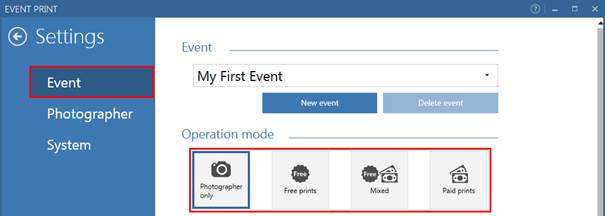
· Photographer only – the Software works only in the ‘accepting photos from Photographer’ mode. On mobile devices, there is a message informing that the system is off.
· Free prints - configuration of an event, in which all accepted photos will be printed as free and will be subject to the limits specified when configuring an event.
· Mixed (with free photos & paid over limit) - set an event in which, after exceeding the set limit of free photos, there will be an automatic switch into a paid mode - the order will be sent to a separate queue waiting for approval.
· Paid prints - configuration of an event, where there are no free prints - all orders received require the payment of fees and approval before printing.
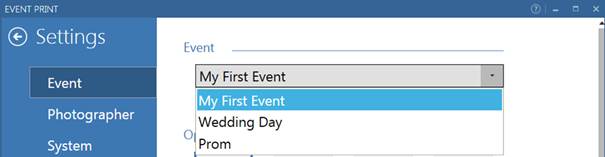
All previously configured events will be available on the drop-down list.
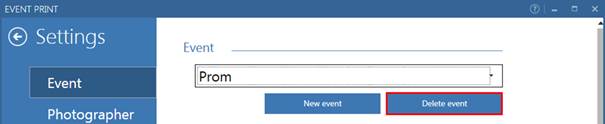
Each event can be viewed (by selecting it from the list), or deleted (to do so, select an event from the list and press the [Delete event] button).
2.1 Mode: Photographer only
Whilst working in the Photographer only mode, the Software will accept photos only from the photographer. On mobile devices, there is a message informing that the system is off (no other user can send images). NOTE! Once configured, the Photographer only mode is valid in all modes - the photographer can print photos in all modes. Furthermore the Photographer account works on a different basis than for an individual user. The photographer is in no way limited - no limits for a given event apply to him.
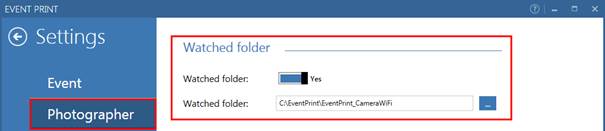
The Photographer can use the system by defining a Watched folder. NOTE! The Photographer account is defined in the Software’s settings (in the Photographer tab).
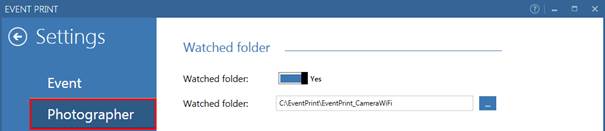
2.1.1 Watched folder
The Photographer who uses a camera with Wi-Fi or an Eye-Fi card, can connect them with the Event Print Software. These devices must be configured to transfer files into a specific folder - in the Event Print Software this folder name is a Watched folder. The Photographer must enter a path for a Watched folder in the Software’s settings.
2.1.2 Event configuration in the Photographer only mode
To select a mode, press the appropriate button:
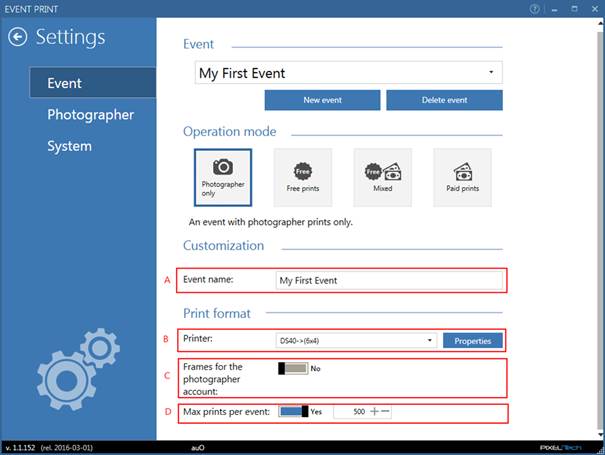
Make the detailed configuration by specifying:
· A - the displayed name of the event (e.g. Wedding of Anna and Luke, Prom 2015, etc.) – the name is set optionally (by default the display name is given when creating the event),
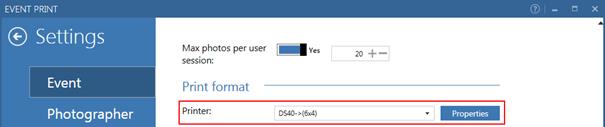
· B - a printer and paper size, on which the printing will take place,
· C – frames for the photographer account - the photos received can be printed with a frame (in this case set the switch to the [Yes]) or without (in this case set the switch to the [No]),
· D - the maximum number of photos that can be printed during the event (if it has to be determined).
If the photos received should be printed with a frame, set the switch to the [Yes] and load the frame for horizontal and vertical photos (to load a frame, click on the [Load image…] button for each option).
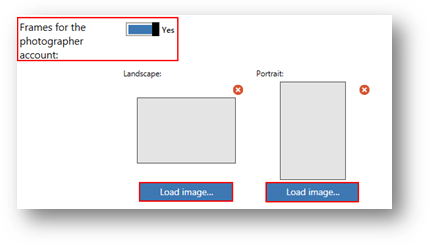
NOTE! The frame should be prepared in accordance with the format (aspect ratio) in which the photos will be printed.
2.2 Mode: Free prints
To select a mode, press the appropriate button:

Then make the detailed configuration, by specifying:
· A - the displayed name of the event (e.g. Wedding of Anna and Luke, Prom 2015, etc.) – the name is set optionally (by default the display name is given when creating the event),
· B - the appearance of the Welcome screen of the mobile application (the background and the title),
· C - the maximum number of photos in the session (if it has to be determined - if not, switch the button to the [No]) - this number specifies the maximum amount of photos that you can send in a single order.
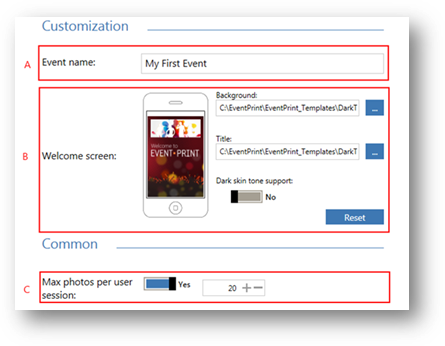
This section also contains the ![]() button that allows you to return to the default settings of
the Software.
button that allows you to return to the default settings of
the Software.
In the next step, specify the settings for printed photos (this is where you can change the printer and paper size, on which the printing will take place):
The photos received can be printed with a frame (in this case set the switch to the [Yes]) or without (in this case set the switch to the [No]). If the photos are to be printed with a frame, load the frame for horizontal and vertical photos (to load a frame, click on the [Load image…] button for each option).
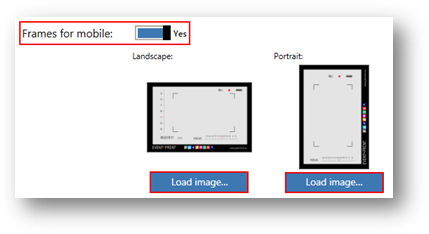
NOTE! The frame should be prepared in accordance with the format (aspect ratio) in which the photos will be printed. By default, there are two 10x15 format frames prepared for the Citizen / DNP printers.
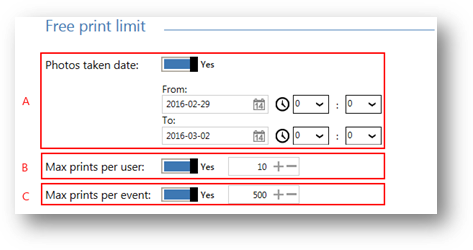
The last step is to determine the limits of free prints (if a limit applies). You can use three types of limits:
· A - limit of photo-taking date - determines the date range from which the photos can be sent to be printed,
· B - photo limit for a given device (user) - sets a limit on free photos that can be sent from one device,
· C - the maximum number of photos on the event – the total number of free photos for the configured event.
2.3 Mode: Mixed (with free photos & paid over limit)
To select a mode, press the appropriate button:
Then make the detailed configuration of an event. In this mode, all options from the Free prints, together with an additional Paid prints option, are available.
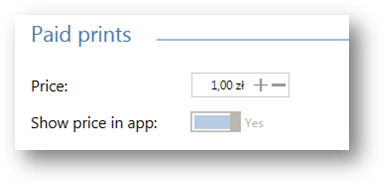
You can specify a price for a single photo - this price is multiplied by the number of photos sent to print and will be displayed at the conclusion of the order on the mobile device of the final user.
2.4 Mode: Paid prints
To select a mode, press the appropriate button:
Then make the detailed configuration of an event. In this mode only options about an event and a printout size are available. It is not possible to configure free photos. You can only carry out a configuration for paid photos.

2.5 Users of the mobile application
As
an owner of the Event Print Server Software you can manage the users of the
Event Print mobile application who are connected to the EventPrint network and
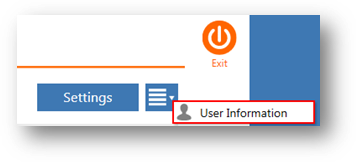
want to send photos to it. To do this, in the main window of the Event Print
Server Software, press the ![]() button and select
the [User Information] option.
button and select
the [User Information] option.
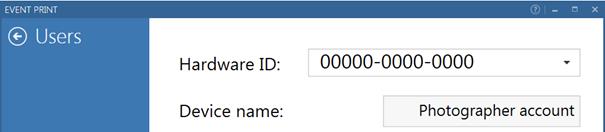
In the window that appears, you can filter the users of the mobile application with the given identifier which is assigned automatically when the user first connects his device to the EventPrint network (the 00000-0000-0000 identifier is always applied to an internal Photographer account).
The Users dialog window provides a summary of information about the users of the mobile applications.
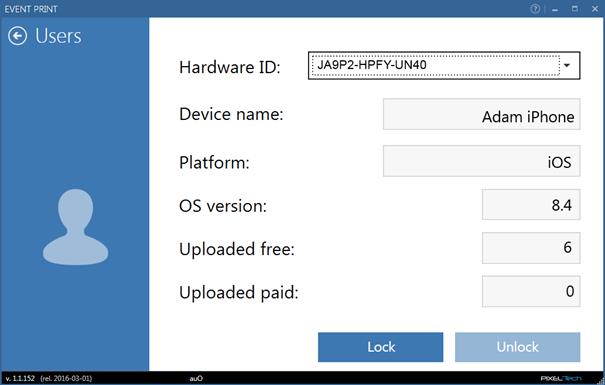
It includes – among others - information about loaded free and paid
photos by each user. In this window you can lock and unlock each user. To lock
a user, select him from the drop-down list and press the ![]() button.
The view of the locked user in the Event Print Server Software window will be
as follows:
button.
The view of the locked user in the Event Print Server Software window will be
as follows:
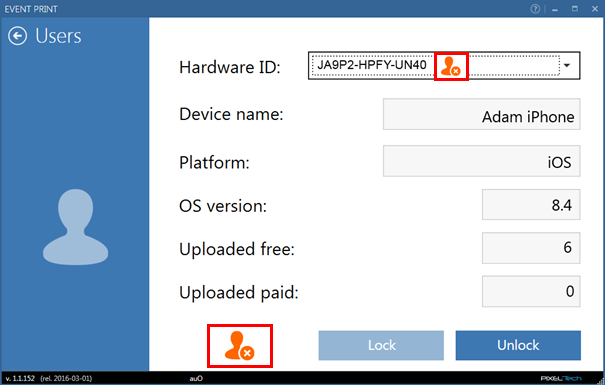
When a user is locked, the following message appears on the screen of his mobile device: This device has been locked. To clarify the situation, please contact with the Event Print Server Software operator.
To unlock a previously locked user, select him from the list and
press the ![]() button.
button.
3. System configuration
To make an Event Print Server Software configuration, in the main window of the Software press the [Settings] button.

In the Settings window that opens, go to the System tab.

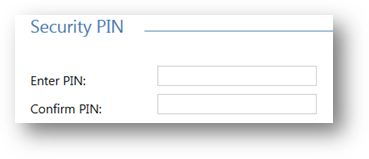
You can change the default PIN here (the default PIN is 1234).
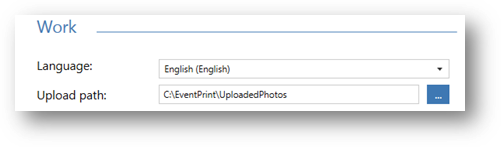
Then you can specify the directory to store all data concerning your events and a language for the user interface. An Upload path is a directory in which a subdirectory will be created with the name of the event (previously sent photos and information about the event will be saved here.
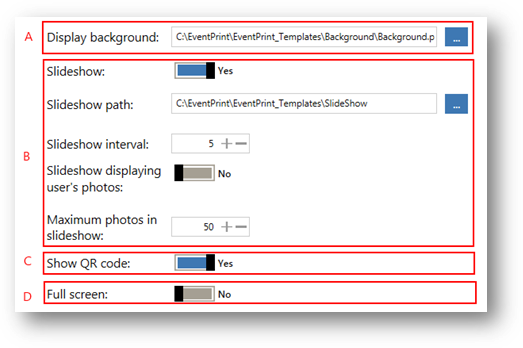
You can also customize the look of the main Event Print Server application window (A) by determining the background of the screen (the background will be displayed during the slideshow, when the Slideshow option is enabled), (B) by integrating and configuring a slideshow, (C) by enabling the visibility of the QR code containing a link to the mobile application (QR code will be displayed on the screen during a slide show), or (D) by running the full-screen mode. The elements of the slideshow can be both .png and .jpg files. You can also specify the frequency of changing of particular slides (in seconds per slide).
3.1 Internet via Event Print Router
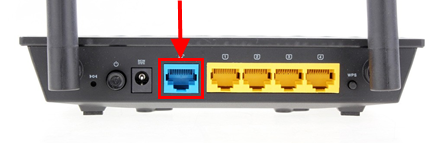
NOTE! The way to share the Internet through the Event Print Router depends on the type of connection with the router. If you have an access to the Internet via cable you can plug it into the WAN port of the router.
4. Working with the event – the main window of the Event Print Server Software
The main window of the Event Print Server Software consists of several parts. You can all the time monitor your work and the Software’s configuration. While working with the Software, the view of the main window will change by updating your printouts statistics all the time.
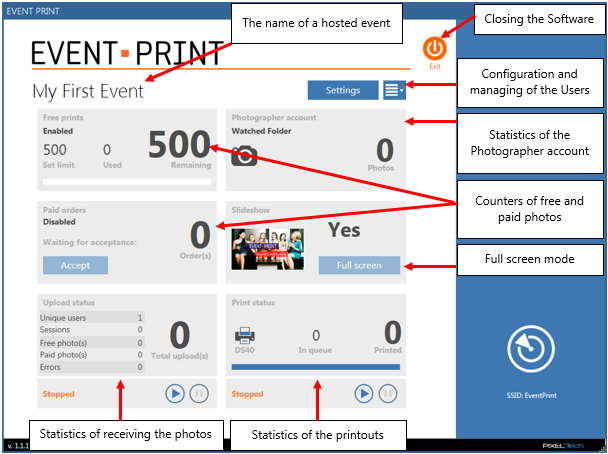
To start the
service of receiving photos, press the ![]() button in the Upload
status section.
button in the Upload
status section.
To start the
printing of photos service and to start statistics of printouts, press the ![]() button in the Print status section.
button in the Print status section.
In the main window of the Event Print Server Software you can:
· monitor the number of the free orders (how many were contracted, how many were used and how many remain to be printed),
· monitor and accept the paid orders,
· monitor the statistics of receiving photos and statistics of printouts,
· enable the full-screen mode,
· monitor photos sent from the Photographer,
· go to the Settings of the Software and to the list of the Users.
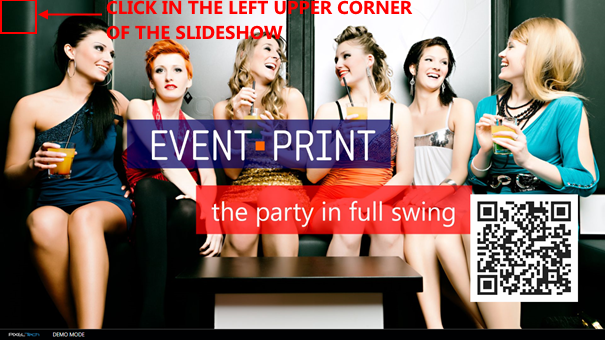
NOTE! When the Event Print Server Software is working and you start the receiving photos service, then after pressing the [Full screen] button, the Software displays a slideshow mode and locks the screen. To exit the slideshow, click with the left mouse button in the upper left corner of the Software window and enter the PIN.
In case of questions please contact with:
Trademarks and names used in this document are property of respective companies. Microsoft and Windows are either registered trademarks or trademarks of Microsoft Corporation in United States and/or other countries.
PIXEL-TECH Company does not guarantee that all information included in this document is correct.
The information presented here may contain technical inaccuracy or errors. The changes and corrections are made periodically and will be included in the next editions. PIXEL-TECH Company may do changes and improvements of its products or software without notice. PIXEL-TECH company may use or send the information from the users in any form considered as suitable, without any obligation to the users.
© Copyright 2016 PIXEL-TECH. All rights reserved.
All the contents of this document, including the layout, graphics and text are copyrighted. No part of this publication may be reproduced, stored in a retrieval system, or transmitted in any form or by any means — electronic, mechanical, photocopying, scanning, or otherwise — without a prior written permission of the PIXEL-TECH company.